Soldering is a skill that can save you time and money by allowing you to do electronics work on your own guitars. Learn this easy skill, purchase a nice soldering tool, and you’ll never have to take your guitars to a tech for jack repairs, pot replacements, or pickup swaps. Soldering is not only easy, but it allows you more flexibility to test different components, something that would cost a fortune if you were paying a guitar tech.
Weller WE1010 Soldering Station, Amazon
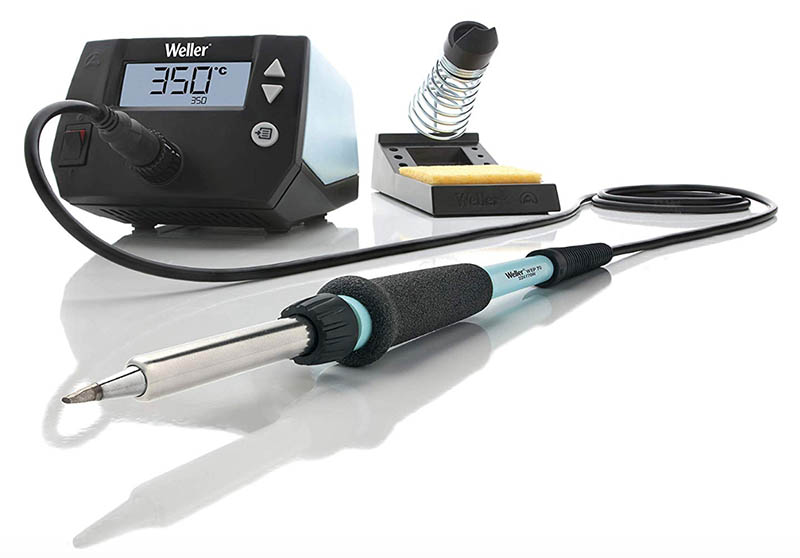
This is the best soldering iron I’ve ever used, and I highly recommend it for guitars, amps, pedals, cables, and other instrument repairs. It can handle any of these applications easily. At 70 Watts it has enough power to get the soldering tip to 850 degrees. This is more than you’ll need for most applications, and for the majority of small electronics work I’m running mine right around 650 degrees.
Table of Contents
What is Soldering
Solder is a fusible metal alloy used to create a permanent bond between metal workpieces [1]. If you have two wires, or a wire and a pot lug, or a wire and an input jack lug (you get the idea), soldering allows you to fuse these pieces of metal together to form a bond which ideally provides no electrical resistance. I say “ideally” because that depends on the quality of the solder and soldering technique, more on that later.

There are different types of soldering, so don’t get this confused with jewelry soldering which can use irons or flame like butane. There’s also plumbing solder which again uses open flame from a torch as the heat source, and different forms of lead ratio solders depending on the type of pipes that are being fused together. Drainage or sewage waste pipes can be fused together using a higher lead content solder compared to clean, drinking water tap which must use a low lead solder type.
One of the most important qualities of solder (for electronics or plumbing) is that it has a very low melting point. That low melting temperature allows us to fuse together disparate pieces of metal without heating the separate components up to their melting temperatures, which would damage the components beyond repair.
Electronics solder melts right around 361 ~ 374°F (183 ~ 190°C) for the Kester I recommend below, making it easy to reach that point using a standard soldering iron like we’ll explore next.
What Types of Soldering Irons Exist
There are three main types of soldering irons that exist. Standalone irons with a set temperature output, soldering stations which allow for specific outputs to be set by a separate control unit, and soldering guns which should not be used for guitar electronics.
Standalone soldering irons
Standalone irons are generally very cheap and most people have one coiled up in their junk drawer. You can typically get these around $20 – $30. The advantage of an iron like this is that it’s cheap, and for very simple jobs can do just fine soldering small parts together.
If you have an iron like this, you can generally get away with using it for a little while, however you’re going to run up against its limitations pretty quickly.
Though some modern soldering irons have small adjustment knobs on them, I strongly suggest going with a good soldering station that gives full control over the temperature of the iron. This will ensure that you are only using the necessary heat for the components, while allowing for high settings when applicable.
Soldering stations
Weller WE1010NA Soldering Station, Amazon
Soldering stations have a unit which provides power to the attached soldering iron, and a dial allowing you to set the output temperature. This flexibility is important in setting the correct temperature for the components that are being soldered together.
Large joints with more mass need to be heated up quicker to keep the component from being damaged, while also having enough heat to create a good solder connection. Smaller joints, or heat sensitive parts like PC boards, require close attention to the amount of heat applied or damage will result very quickly. A soldering station allows for these small adjustments in output allowing for components to be soldered correctly without damage, and while creating a good electronic connection.
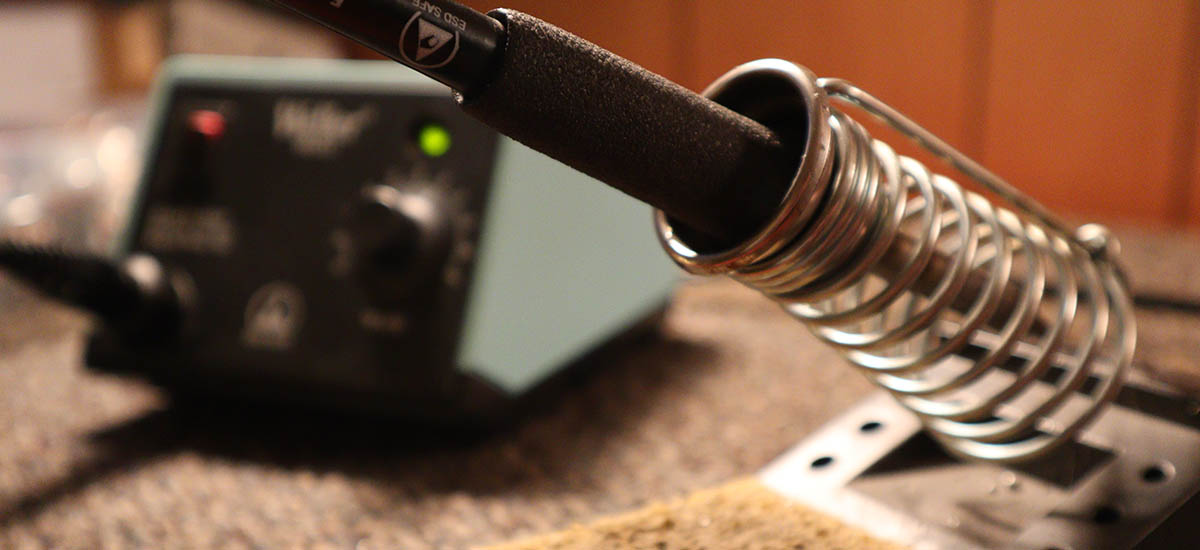
The best soldering station that I’ve ever used is the Weller WES51. This station is common amongst guitar and amp techs, and can be found on all the workbenches at amp companies like Dr. Z. It is simple and easy to use, with an On/Off switch and a temp dial right on the front. It comes with an iron stand which also provides a place for the sponge to go. A sponge is essential when soldering, and this is something most standalone irons don’t provide.
Buying one of these is a great investment. I have been using the Weller WES51 for the past 7 years and it still works great. Weller came out with a new model (which replaced the WES51), the WE1010NA which sports a great looking digital control panel for your temperature adjustments and the same soldering iron stand which is awesome and I can’t imagine too many improvements on that design.
One of the major enhancements made on the new Weller soldering station is a standby mode which powers back when not using to conserve energy. This is a great feature as any soldering station or iron draws a good bit of power to stay hot.
The $100 price tag might initially be a deterrent away from a nice soldering station, however let’s take a look at some common repair costs. When I was doing guitar and amp repair I would typically charge $30 an hour for electronics work. This is on the low end of repair costs, which I’ve seen easily run up to the $60 mark. If you had a full pickup swap, and a new rewire of all your components, that could easily run up a $100 repair bill. You could spend the same amount of money to buy your own premium soldering station that you would for someone to do the electronics work for you. I always recommend to people if they have the slightest bit of handyness in their bones, or they want to learn, go pick up a nice soldering station. It’s something you will not regret doing.
Soldering gun
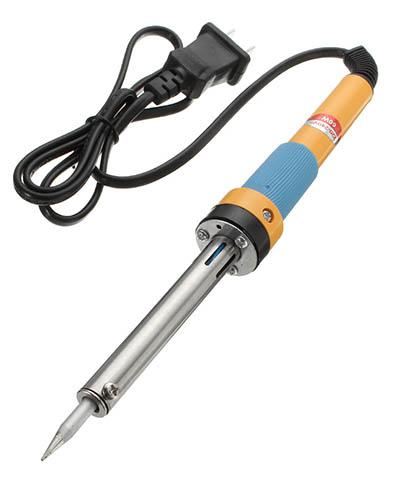
And that brings us to our last type of soldering implement, the soldering gun. Now soldering guns are useful because they typically pack a much larger punch than a soldering iron. For example, this Weller soldering gun (pictured below) has an output of 260 Watts, while the Weller soldering station I recommend above puts out 70 Watts max.

The higher output of the soldering gun can be incredibly useful if joining two large mass pieces of metal that require a large amount of energy to heat up. However, this is way too much heat for guitar and amp electronics and should be avoided at all costs.
Excessive heat is not the only reason to avoid soldering guns around guitars, which brings us to…
Don’t Ever Use a Soldering Gun Near Your Guitar
Yes, soldering guns can damage components because of the excessive output of heat they provide. However the biggest reason to never use them around a guitar is that a soldering gun can ruin your pickups.
Soldering guns generate a high amount of amps which are supplied to the tip of the gun. These amps are created by a transformer which takes mains, outlet voltage and turns that into high amps via the transformer. Those high amps are then sent to the soldering tip to quickly heat up the tip element. Transformers, which are used extensively in musical gear like guitar amplifiers, generate an electromagnetic field when voltage is applied to the primary coil.
The electromagnetic field created by a soldering gun is so strong that if used in close proximity to a guitar’s pickup, it can remagnetize or demagnetize the bar magnets or pole pieces in ways which may alter the sound of the pickup.
I know it may be tempting to use what you have lying around the house, but whatever you do, do not use a soldering gun close to your guitar pickups.
Typical Soldering Applications on a Guitar
While there are solderless systems out there, the vast majority of pickups and components require solder work to install. In fact I’d stay clear from these solderless systems as they become very difficult to work on if they begin to fall apart, which I’ve seen a lot of them do.
Fixing a bad output jack
One incredibly common repair is replacing, or resoldering the output jack. Often these come loose and start to wiggle around. If this movement continues it will typically spin the wires around enough to break them off their solder joints, or compromise the solder joints enough to lose a good electrical connection.
Replacing components
Replacing pots is also fairly common as they can suffer the same fate as in the output jack. Pots can also go bad over time and old pots are generally plagued by dirty resistive elements that crackle and pop even after a good cleaning.
As the aftermarket boutique pickup market has sprung up, so has the number of pickup swap requests. Swapping pickups can be fun and rewarding, turning a lower end guitar, or one that just doesn’t agree with you into that exact sound you’re searching for. Pickup installs generally run $25 to $40 per pickup at a repair shop. This is an easy cost to cut down on if you can do it yourself.
Dealing with hum in an electric guitar
The obnoxious hum of single coil pickups inspired the advent of the “humbucking” pickup. While some hum in a guitar can be attributed to the pickups grabbing electrical interference from their surroundings, other hum can be attributed to poor grounding, or bad shielding.
These grounding problems can be difficult to find, but close inspection of all ground wires and connections should unearth bad solder joints or poor quality wire. If you have your own soldering station, you can dive right in and fix these problems yourself.
Other Tools for Soldering
A good soldering station is a start to working on your own equipment, but there a few more things you’ll want to pick up while you’re at it.
Solder
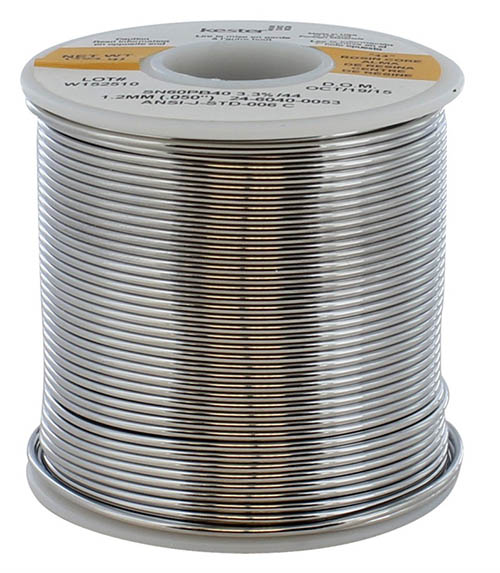
Kester 24-6040-0053 Solder. This is the solder you want to use for guitar electronics. From Amazon.
Obviously if you’re soldering something, you need the solder to go with the hot iron you just picked up. For electronics work, I recommend the Kester 24-6040-0053. This solder is a 60/40 tin/lead blend and works great for bonding all electronics in a guitar, pedal, cable, or amp. Solder comes in different diameters, but I find that the .050” of the Kester roll I recommend is just the right size for guitar work.
It comes in a roll which is 1 pound, and will last for a long time. Because there is lead in solder, you want to be careful not to inhale the fumes coming off the soldering iron tip. Have a window open close by and a small fan to blow the fumes away from your face.

I’ve played around with different diameters of solder and find that the Kester 0053 in 0.050″ is the best for guitar and amp electronics work.
Desoldering Pump
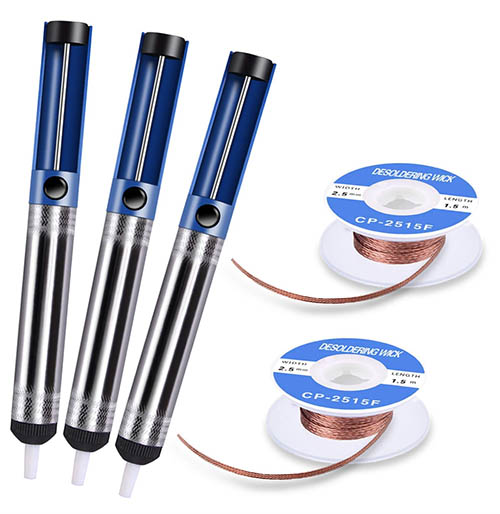
TABIGER Desoldering Wick & Desoldering Pump, Amazon
You need a way to wick away old solder and clean up parts before resoldering components together. There are a couple ways to do this, but my favorite is by using a soldering pump. A soldering pump works by first heating the old solder up to its melting point. Once the solder is liquid, but the pump’s nozzle next to the solder you want to extract and hit the button. This button releases a spring which pulls an airtight plunger back, sucking the liquid solder into the pump. You then push the pump’s plunger back down which pushes the old, now hardened solder out of the pump.
There are a bunch of different styles of pumps out there, but this is the one I recommend. This package also comes with desoldering wick, which is a material that pulls old solder into it, and can be very effective if trying to get into small or tight spaces.
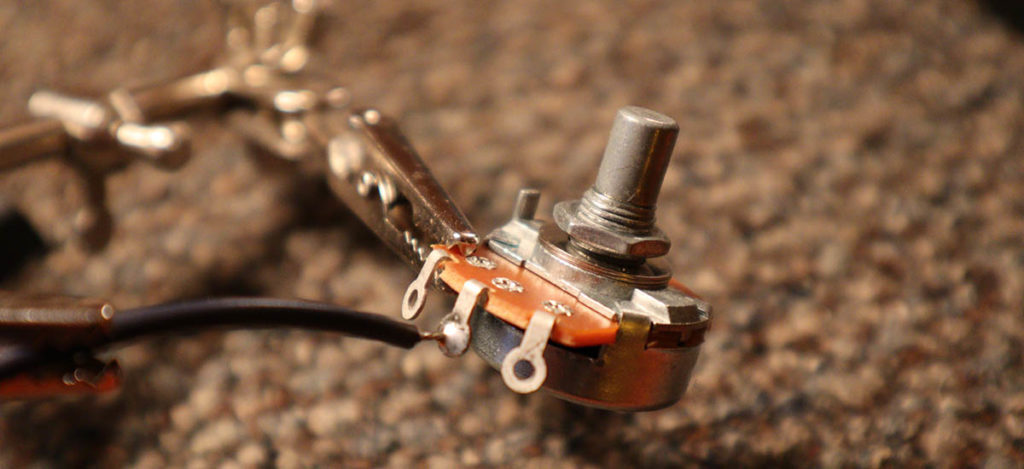
Tool for holding wires
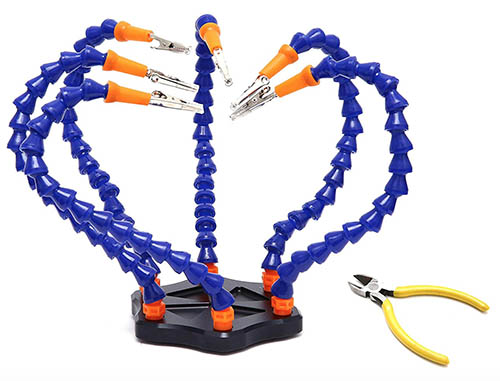
Third hand soldering tool, Amazon
One tool I highly recommend is a “third hand” which has a couple alligator clips to hold wires and other components while you solder them together. This is a pretty cool one that helps tremendously when trying to solder two things together, especially with holding ground wires to the back of pots. There’s just no good way to do that without one of these.
Wire strippers
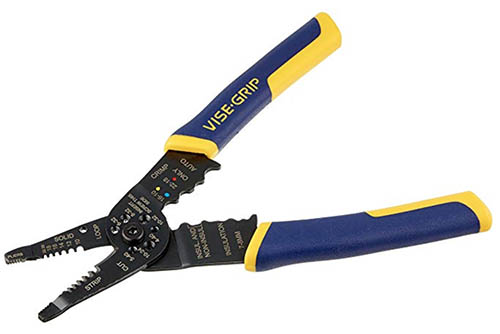
VISEGRIP wire strippers, Amazon
If you’re doing any amount of electronics work, you’ll need to have a pair of wire strippers. They don’t need to be fancy, but they at least need to be able to strip both nylon and cloth wires. I find that these work great for all gauges of wire found a guitar, amp, or instrument cable.
Flush wire cutters
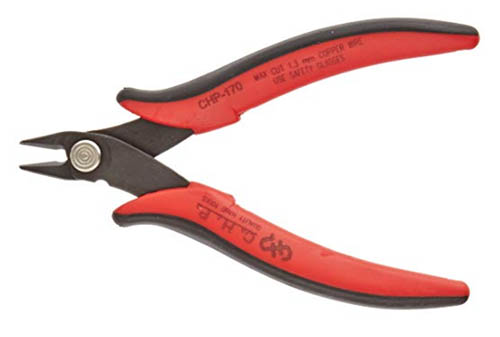
While the wire strippers do have a wire cutter at the back, these are hard to get into tight spaces and won’t provide nice, clean electronics work. For that you’ll want to get a pair of flush mount snips that allow you to cut a wire right next to the edge of a component. The ensures that leads are trimmed neatly and there’s no chance of leads touching other components they’re not meant to.
Cloth to cover instrument
Your soldering iron is running at hundreds of degrees, and the liquid solder is just as hot. The last thing you want is for some liquified solder to slip and burn a hole through the finish of your guitar. It can happen in an instance and then you’re looking at a pretty costly repair.
If using a soldering iron around an instrument I always make sure that the instrument is covered with some sort of cloth. I usually use old microfiber cloths that have been retired from polishing duties. These cloths won’t scratch the instrument and I don’t care if they get some metal in them. Don’t use a cloth for this and then use it to polish your guitar. I have seen this done before, and inevitable a small piece of metal solder or extra wire gets lodged into the cloth. Trying to polish a guitar with a cloth that has a piece of metal in it will turn out disastrously.
I’m a huge advocate of not buying polishing cloths. Just buy flannel in bulk from Amazon. It’s much cheaper and you’ll have a ton of material to work with.
Solder Safely
Fumes
I mentioned fumes earlier and I’ll reiterate that here. Solder contains lead, and while this is necessary to create a strong electric bond, the fumes can be pretty gnarly. In the least, have a small fan blowing the fumes away from your face so that you’re not breathing those directly as they rise from your soldering tip. There are some other unique ways to deal with this issue. If you’re soldering a lot, consider building a vacuum system which sucks the fumes into a tube which vents outside. Here is a setup build like this.
Eye protection
One thing to be extra careful of are wires under tension. Sometimes it’s hard to tell that a wire is under tension then you go to desolder it, say from a pot lug, and once the solder liquifies it springs forward splattering molten hot solder across the room. This flying solder could do some serious damage if it landing in your eyes, so always wear a pair of clear safety glasses to protect your vision.
One way to help prevent this is to keep an arm from your third hand on any wire that you’re desoldering. Place the alligator clip close to the end of the wire so that there isn’t much room for the wire to move if it does end up under a bit of tension.
Fire hazard
Soldering irons are, by nature, very hot and can cause damage to objects around them or even catch things on fire. Make sure that your soldering setup is free from anything that could easily catch on fire, and make sure that the iron is always put away in the stand when not in use. All soldering stations come with stands, while many standalone irons do not. I’ve made the mistake of not unplugging an iron once and will never do that again. I came home to the hot iron dangling inches above the carpet in my basement. Another couple of inches and that would have ended tragically.
This is one of the features I like most about the Weller Soldering stations. These units shut off after a certain amount of time. There’s a backup there so that if you forget to turn it off, it’s not going to be incessantly trying to burn down your house.
Conclusion
Learning to solder is fun and can unlock a ton of cool things you can tinker with and try out on your guitar, effects pedals, and amps. Learn how to solder and you’ll never buy another instrument cable. Building custom cables to the exact length and specs you need is one of the more rewarding and fun things to do when building the perfect guitar rig.
There are a bunch of soldering irons and soldering stations out there, and I spent a very long time researching all of them before settling on the Weller, which their latest model is now the WE1010. Pick up one of those and you’ll know you’ve got a great iron that will last for a very long time and supply the right power for whatever job you’re taking on.
Don’t take soldering too lightly, while it’s easy to do and a whole lot of fun, it can be dangerous because of the super high temps at which these irons run. Make sure you’re taking the correct safety precautions.
Once you get a good soldering setup, learn the ins and outs of guitar electronics. Try different pots, swap out different capacitors, and find the sound that works the best for you. Once you’ve done that, start dabbling in the world of DIY guitar pedals, amp repair, and of course building custom cables. A good soldering station is an investment and will open up a massive number of fun projects and opportunities.