
Scratches, pops, pings, hum, or the dreaded dead zones, dirty electronics on your guitar can cause all sorts of weird electrical problems and turn your favorite guitar into an awkwardly shaped door stop. In this edition of Set Up Like a Pro, we’re taking a look at how to correctly clean your guitar’s electronic components including the output jack, pots, switches, and more.
Table of Contents
Problems Associated with Dirty Guitar Components
The problems associated with dirty electrical components in our guitars typically reveal themselves in unwanted noise in the signal coming out of the instrument. These noises are often described as scratchy (especially in pots), popping, hum, or dead spots all together. If you’re experiencing weird noises coming from your guitar when it’s plugged into an amp, you’ve got something going on with your guitar components.
The most common issue you will find is with pots, or potentiometers. These tone and volume controls often attract dust and debris onto the resistive strip causing a scratchy noise when sweeping the knob back and forth.
Cleaning your guitar’s electronics should be done on a regular basis as part of your standard maintenance schedule. If you clean the components regularly, they will last much longer than if you only clean them when you notice a problem.
Most of the time, light preventative maintenance will keep your components in good shape, but if they have been dirty for too long there may be a chance they need to be replaced. Read on to discover how to know if you need to replace a component in your guitar.
How to Clean Guitar Pots
Potentiometers are the most common source of unwanted noise in your guitar. Because of the small amount of electricity flowing through them, along with any static buildup that can occur on your guitar, small bits of dust and debris cling to the inside of the pots.
A pot is a simple device that allows for variable resistance, and is more often called variable resistors in other parts of the electronics world. It consists of two major parts, the resistive element which is a semi-circle of material that increases in resistance from one side to the other, and a wiper, which is connected to the shaft and is used to select the desired setting.
The contact between the resistive element and the wiper need to be clean, solid, and free from debris or else you will hear the telltale sign of a dirty pot. It will scratch every time you move that knob back and forth. More often than not, dirty pots can easily be cleaned by spraying them out with contact cleaner and manually rotating the pot shaft back and forth.
Cleaning guitar pots is easy to do, so let’s get into it with some examples of different guitars.
Can I use WD40 to clean guitar electronics like pots and switches?
No, while WD40 is a great lubricant and does contain anti-corrosive elements, it also attracts dust and dirt, the exact thing making your pots or switches scratchy in the first place. Contact cleaner is designed specifically for use on electronics and dries quickly, leaving no oily residue behind that dust can cling to.
This is my contact cleaner of choice. It doesn’t take much to clean all the electronics on a guitar, and even with heavy use these can last me a couple years.

Guitar Contact Cleaner
Fast drying electronics contact cleaner.
My favorite for all guitar and amp repair. Anti-corrosive and doesn’t leave any residue that will attract more dirt. Clean those scratchy pots with this.
Cleaning Strat Pots
When cleaning the pots on a Strat style guitar, the pickguard needs to be removed as the pots are mounted to the back of it. Loosen all of the strings and remove the pickguard screws. You should now be able to carefully lift the pickguard off the guitar.
The electrical components on the pickguard are connected to the guitar most typically in two spots, the lead wire which is going to the tip of the output jack, and the ground which is connecting all of the electronics and the metal hardware of the guitar. The ground is generally soldered or bolted to the bridge or tremolo system. Be careful that you pull the pickguard off gently as to not disconnect or break these wires.
Throw a cloth down on the guitar, flip the pickguard over, and let’s get to cleaning.
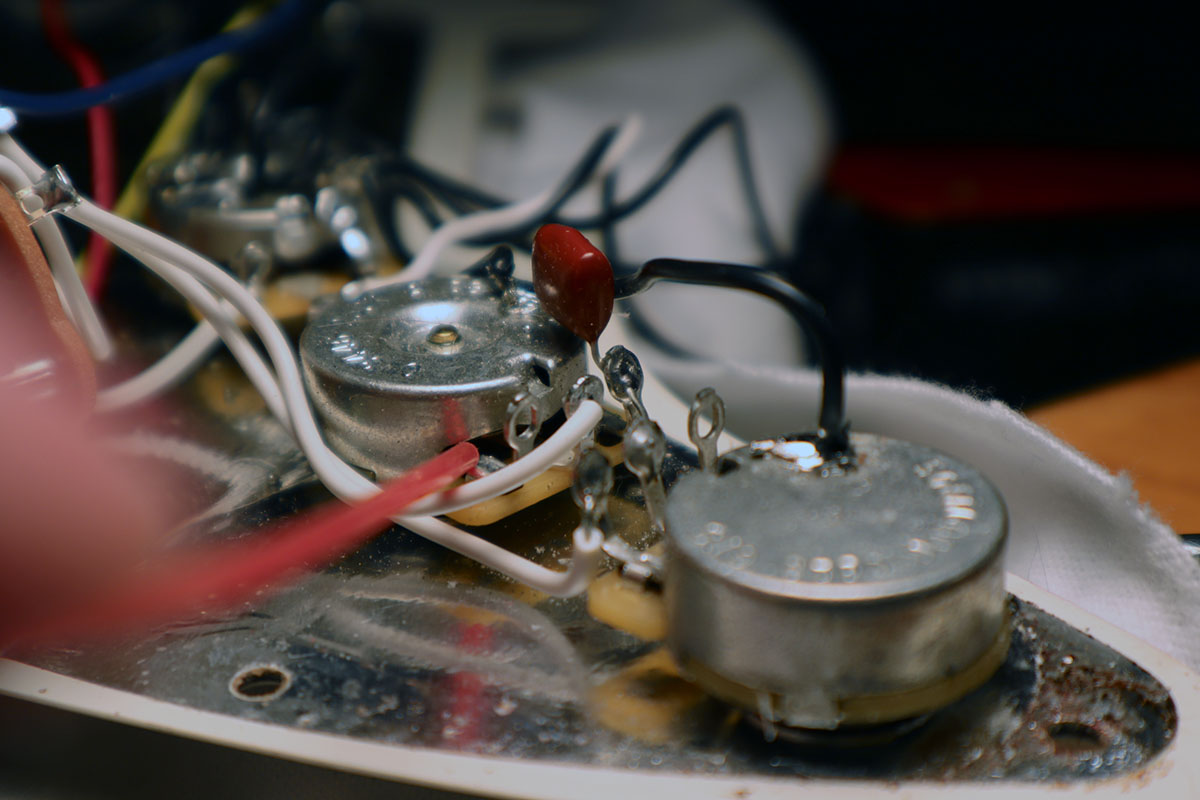
Once you have the pickguard off the guitar that hard part is really over. Spray a small squirt of contact cleaner into the small opening in the side of the pot where the lugs go into the component. Manually move the pot back and forth by its knob to clean and release any unwanted debris or dust.
Contact cleaner dries quickly, so you’ll want to work fast. If excess cleaner is pooling or dripping anywhere clean it up with a cloth. Most finishes, like my Strat’s polyurethane, can handle a little contact cleaner on them without an issue. However I always put a cloth down to catch any wayward contact cleaner. Especially if working with older, possibly cracked or checked lacquer finishes, you’ll want to be extra careful not to drop unwanted fluid or cleaner on the guitar.
The pot should now be cleaned out and sweep back and forth with no popping or scratching. If you still hear some noise, repeat the contact cleaner spray until the pot no longer makes noise.
Cleaning Tele Pots
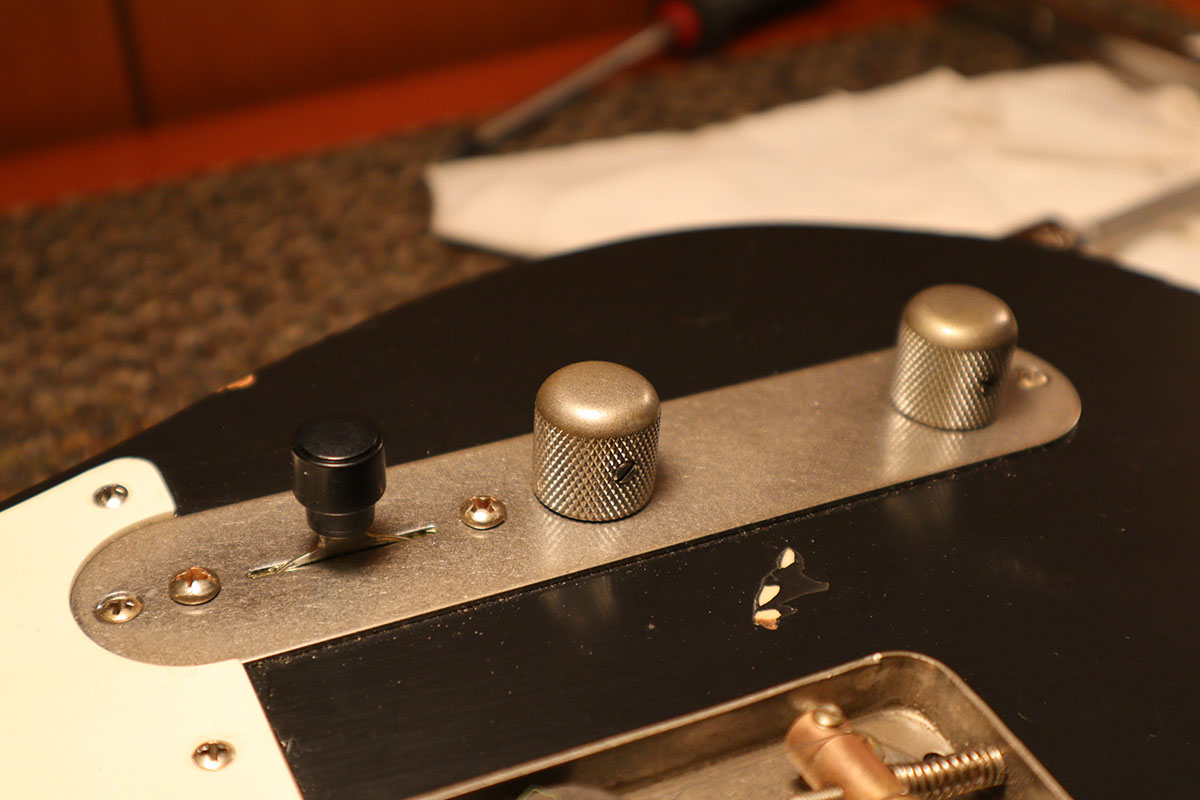
Cleaning the pots on a tele style guitar is quite a bit easier seeing as the control plate for the pickup selector, tone and volume knob is small and only held in place by two screws.
Similar to the Strat cleaning, simply unscrew this plate and access the underside of the pots. Shoot some contact cleaner on the switch and inside of the pot chassis and you’re good to go.
Cleaning Semi-Hollow Pots
Cleaning pots on a semi-hollow or hollow body guitar can be quite a bit trickier. Most likely there isn’t any access to the backs of the pots, though some do have a control plate on the back which can be removed to service electronics. You’ll need to do it either through the F-hole closest to the pot or through the pickup slot.
Most of the time you can loosen the nut on a pot, turn the pot so that the opening is facing the f-hole, and then finagle the straw of the contact cleaner in there. This is by far the easiest way of doing it, and a set of dental tools is invaluable to getting in those hard to reach areas.
Keep in mind that because of some types of wiring it may be impossible to turn the pot in the way you need it. For example, some grounding circuits use heavy wire to link the pots which more or less freeze them into place where they are. If this is the case, servicing will need to be done through a pickup hole.
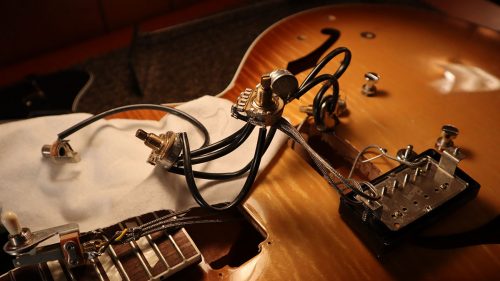
In some cases, like this one, It was easier for me to pull the pots through the bridge pickup hole. I needed to pull the pickups anyway to diagnose a different issue. This access allows me to thoroughly clean all the electronics before putting them back.
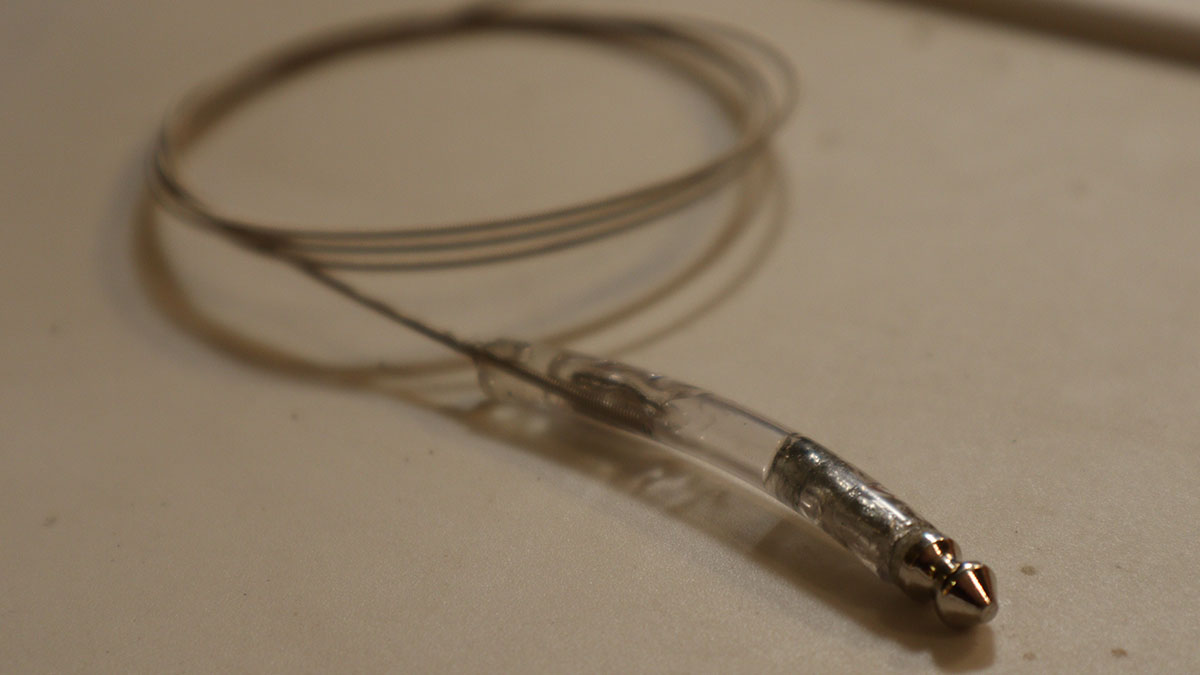
If you’ve tried something like this before, you’ll know that it’s very difficult to get the output jack back in place. I use a homemade tool that does the job perfectly. It’s an old jack epoxied to 1/4″ tubing with a string attached.
How to know if you need to replace a pot
Long term damage eventually occurs on most pots resulting in corrosion on the resistive element. Most often in these circumstances the popping and scratching will turn into dead spots in the range of the pot where the sound of the guitar cuts out entirely. A spot like this doesn’t allow the guitar’s signal to run through that component and a short circuit situation occurs.
In these situations you’ll need to replace the pot entirely. Thankfully this is an easy fix as long as you have the right soldering iron and solder.
We can also check the pot electrically. Grab your trusty multimeter and put it on resistance or ohm mode. Now connect the ground lead to one of the outside lugs, and the positive lead to the wiper, or middle lug. Slowly move the pot back and forth and see what the meter registers. You shouldn’t see any high values (or infinity value meaning a full short) as you sweep the wiper across the resistive element.
Open Vs Closed Pots
Some pots don’t have the open slot in the back where the lugs enter the body of the pot. These pots are designed to not open which keeps dust and other particles from sticking to the resistive strip. While more expensive, these pots can last a very long time.
You can also use a tool that is available from Stew Mac or on Amazon. This is a little cap which fits over top the shaft of a pot. It has a hole for the contact cleaner straw, and with the cap or knob off the pot, you fit this over the shaft and squirt some cleaner through the hole. This directs the cleaner down the shaft and into the pot. In my opinion, it’s better to get the cleaner directly onto the resistive strip like I’ve already described, but in a pinch these can be a great option.
How to Clean the Guitar Output Jack
Output jacks can rust, oxidize, and corrode creating issues where the jack isn’t making good physical contact with the jack in the body of the guitar. This happens in two spots, in the barrel and the tip. If you have easy access to the input jack (like on a Strat), this is quite easy to clean. However, on guitar’s like my ES-137 that’s on the bench this can be quite a bit harder.
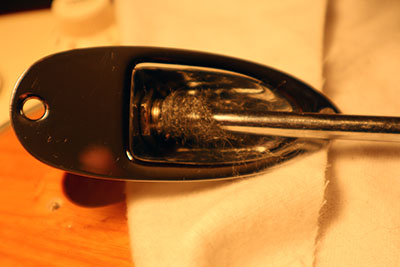
My favorite way of cleaning an output jack is with a screwdriver and some steel wool. Pull off a small chunk of steel wool and wrap it around a screwdriver shaft. Make sure that the screwdriver can easily fit inside the diameter of the jack. If you wrap the steel wool correctly, you can clean both the barrel of the jack and the tip in one go.

Hit the inside of the jack with a little contact cleaner and do it again. Now test with the guitar plugged in to make sure that there isn’t any popping or excessive hum. The most common problems associated with a dirty output jack are hum from a bad ground connection and popping from either the ground or hot lead losing contact with the plug.
If things are really bad steel wool might not be enough. A round file will help in those cases to take off excessive corrosion. Be careful not to take metal off the jack, and if the jack is this bad it might just need to be replaced.
A note on replacing jacks:
A nice upgrade for cheaper guitars is a new input jack. Import guitars typically run cheaper ¼” jacks with looser tolerances. These can cause popping as the plug moves around in the jack. Most often you will need to expand the hole in the guitar or the jackplate to accept the new jack. Import jacks have an outside thread diameter of around .345″ while a nice Switchcraft jack is .375″.
Check out: How to Correctly Replace a Guitar’s Output Jack which shows the process and how I deal with a too small jack plate.
How to Clean Guitar Switches
Switches can also become corroded and develop a layer of gunk that doesn’t allow the guitar signal to flow freely. Most of the time, a good squirt of contact cleaner and manually moving the switch back and forth will loosen that grime and get the switch working again.
If the switch is still popping when moving it back and forth, a small piece of 400 grit (or higher) sandpaper slid gently between the conductive elements should do the trick. Again, be careful not to take any actual metal off the switch, and don’t bend the little tabs as they can be quite delicate and won’t bend back exactly as they were.
Again, if the problem persists the switch may need to be replaced.
Conclusion
I like to clean my guitar’s electronics about every 4 to 6 months. This is a good rate for preventative maintenance that keeps the pots, switches, and jacks clean and free from scratching or popping. In my opinion, if you’re guitar is making noises like that, you’ve let it go too long without a good cleaning.
Start this maintenance on a schedule and your guitar will always be playing its best.